Grafting in Garter Stitch
Grafting, or Kitchener Stitch, is a technique that many new knitters dread – put the word “grafting” in a pattern description and many a knitter will quickly move on. But it’s actually an incredibly easy process, and one that I personally look forward to for it’s meditative qualities.
Grafting makes a new row of stitches between live stitches from two separate pieces of knit fabric, using a cut length of yarn and a yarn needle. The process for joining garter fabric is only slightly different than that for stockinette, but it isn’t as well documented. There are just four steps, plus a little bit of setup:
Setup:
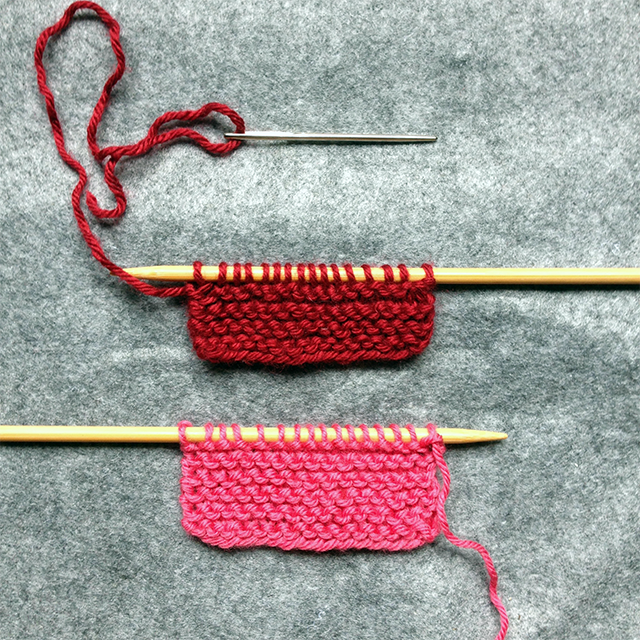
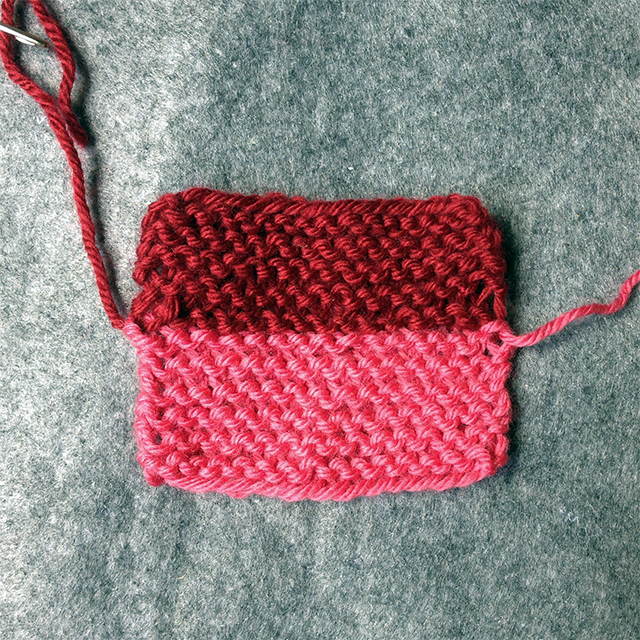
Your first piece of garter fabric should end with a wrong-side row – when seen from the right side, there will be a row of purl bumps directly below the live stitches on the needle. Your second piece of garter fabric should end after a right side row – when seen from the right side, there will be a row of knit stitches directly below the live stitches on the needle. Cut the working yarn from the second piece, leaving a tail about three times as long as the seam to be grafted.
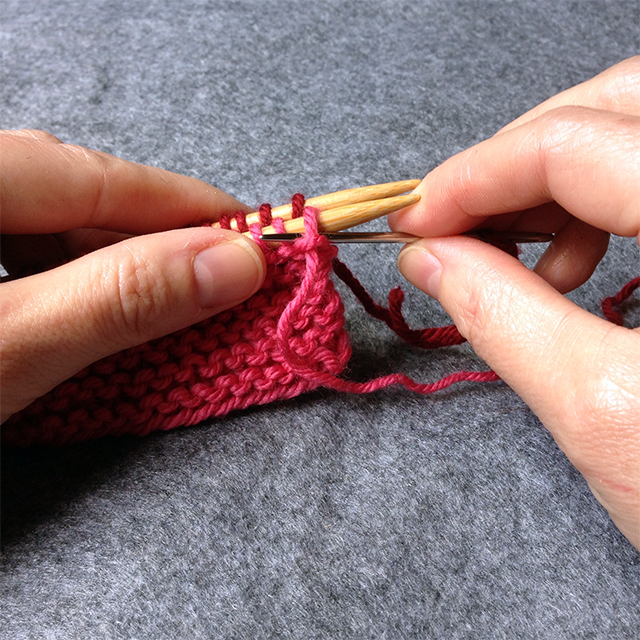
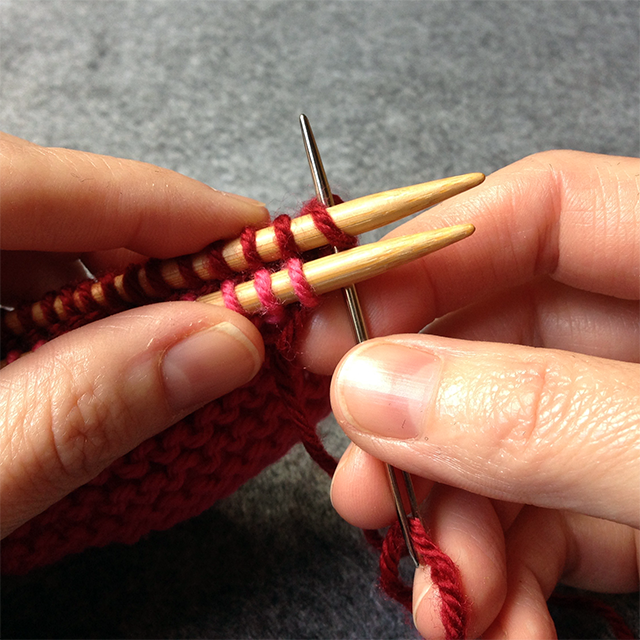
Align the needles holding the two pieces of fabric with wrong sides together and second piece with the long tail in back. Thread the tail from from the back piece onto a yarn needle, insert the needle purlwise through the first stitch on the front needle and pull the yarn through.
Then insert the needle purlwise through the first st on the back needle and pull the yarn through. You are now ready to graft.
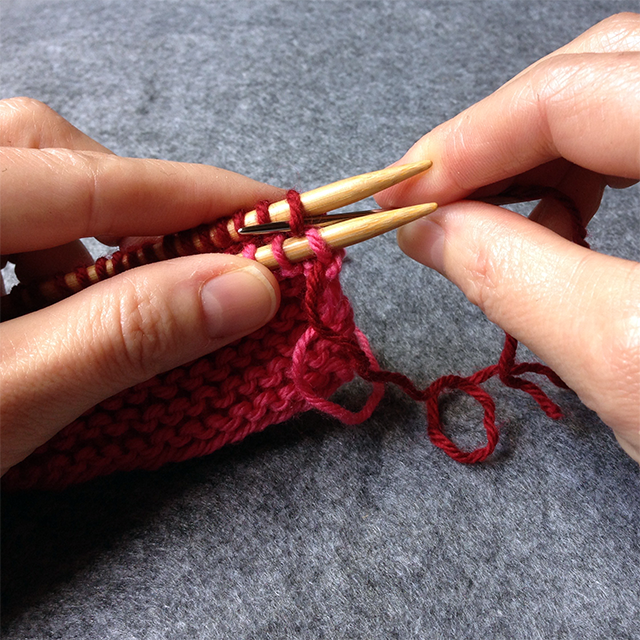
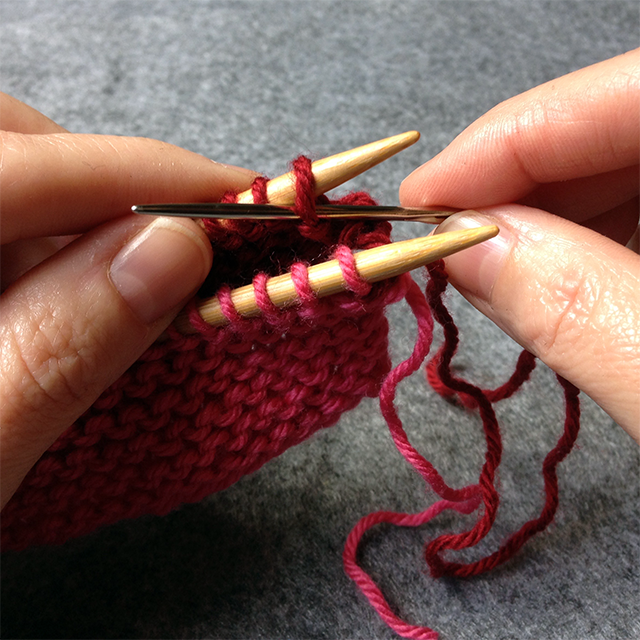
Step 1: Insert the needle through the first st on the front needle knitwise and pull through, letting the stitch drop off the end of the needle.
Step 2: Insert the needle through the next st on the front needle purlwise and pull through, leaving the stitch on the needle.
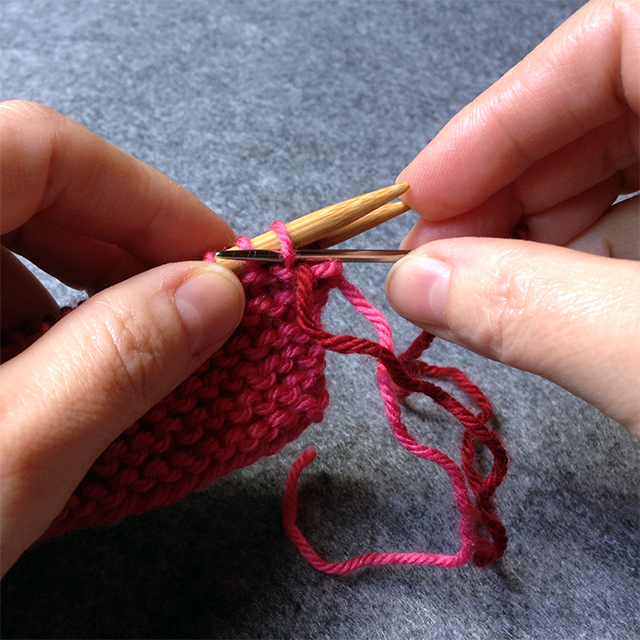
Step 3: Insert the needle through the first st on the back needle knitwise and pull through, letting the stitch drop off the end of the needle.
Step 4: Insert the needle through the next st on the back needle purlwise and pull through, leaving the stitch on the needle.
Repeat these 4 steps until no stitches remain. For best results, pause every few stitches to adjust the tension of your grafting to match the adjacent stitches.
That’s it! That’s all there is to grafting! Pretty simple stuff. I learned to graft from Theresa’s Techniques on Knitty.com. It’s also where I learned the key to the meditative aspect of grafting – the chant. To get through a long graft, like the one on my Ribbon Wrap, you need to focus, talking yourself through each step, which evolves into a simple chant of “knit-off, purl, knit-off, purl…” The repetition and focus required are immensely calming – I highly recommend it!